The command palette is one of the most borrowed ideas in modern software. VS Code has one. Figma has one. Linear has one. Notion has one. Slack has one. GitHub has one.
If you spend time in professional tools, you almost certainly already use one somewhere in your daily workflow.
In every case, the idea is the same: press a keyboard shortcut, type what you want to do, and do it. No menu hunting. No mouse-driven navigation. No remembering where a setting is buried. Just type and act.
WordPress introduced one since version 6.9– but with important limitations that most users do not know about. And a generation of third-party plugins has emerged to fill the gaps that the built-in version leaves open.
This guide explains what a command palette actually is, how it works in WordPress specifically, where the built-in version falls short, and what a dedicated command palette plugin like Commandify adds to the picture.
What is a Command Palette in WordPress Actually?
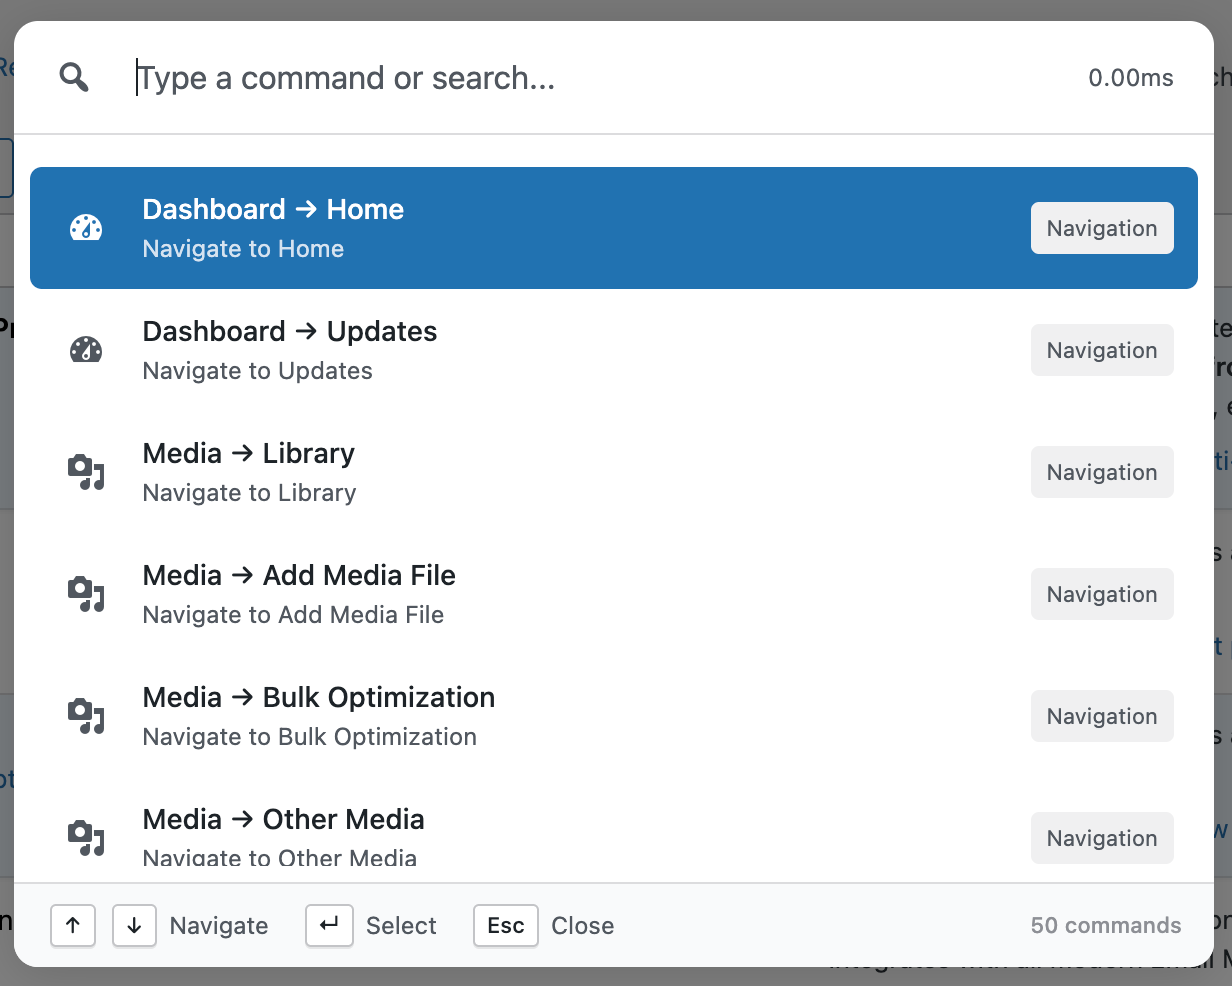
A command palette is a search-driven interface that accepts typed input and returns matching commands, content, or navigation targets. You activate it with a keyboard shortcut, usually Cmd+K on Mac or Ctrl+K on Windows. A text box appears. You start typing. Results appear as you type, filtered in real time by what you have entered.
The results are not just links. They are actions. “Publish this post.” “Clear cache.” “Open order #4521.” “Edit product: Blue Running Shoes.” Each result is something you can do, not just somewhere you can go.
The term “command palette” comes from the programming world. Visual Studio Code popularised it as the way to access every editor function without memorising every keyboard shortcut or hunting through menus.
You press Cmd+Shift+P, type a fragment of what you want, and the matching command appears. The pattern proved so effective that it spread rapidly into other tools until it is now a near-universal feature of professional software.
The underlying principle is simple: searching is faster than navigating when you know what you want. A menu assumes you will browse to discover options. A command palette assumes you already know what you are looking for and just need to get to it instantly.
The WordPress Built-In Command Palette
WordPress added a native command palette in version 6.3, released in August 2023. It is accessible anywhere in the WordPress editor via Cmd/Ctrl + K. In WordPress 6.9, the palette expanded further across more admin screens.
The built-in palette is genuinely useful for certain tasks. Inside the block editor or site editor, you can navigate between templates, insert blocks, toggle editor preferences, add custom CSS, reset template customisations, and jump between pages and posts by typing their name.

For content creators who spend most of their time in the editor, it reduces a meaningful amount of friction.
But it has significant boundaries. As the WordPress command palette limitations guide covers in depth, the core palette is editor-focused. It does not cover WooCommerce. It does not cover plugin management.
It does not cover user accounts or bulk maintenance tasks. It is not available on most standard wp-admin screens outside the editor context. And it offers no integration with the page builders, form plugins, or e-commerce tools that most WordPress sites actually depend on.
For someone whose WordPress life extends beyond writing posts, the built-in palette covers a portion of their daily work and leaves the rest unchanged.
Why WordPress Admin Navigation Is a Problem Worth Solving
To understand why a command palette matters for WordPress specifically, it helps to understand what WordPress admin navigation actually looks like for someone who manages a non-trivial site.
A typical WordPress admin menu has somewhere between 20 and 60 top-level and second-level menu items, depending on how many plugins are installed. A WooCommerce store adds its own section with Orders, Products, Customers, Reports, and Settings, each with multiple nested tabs.
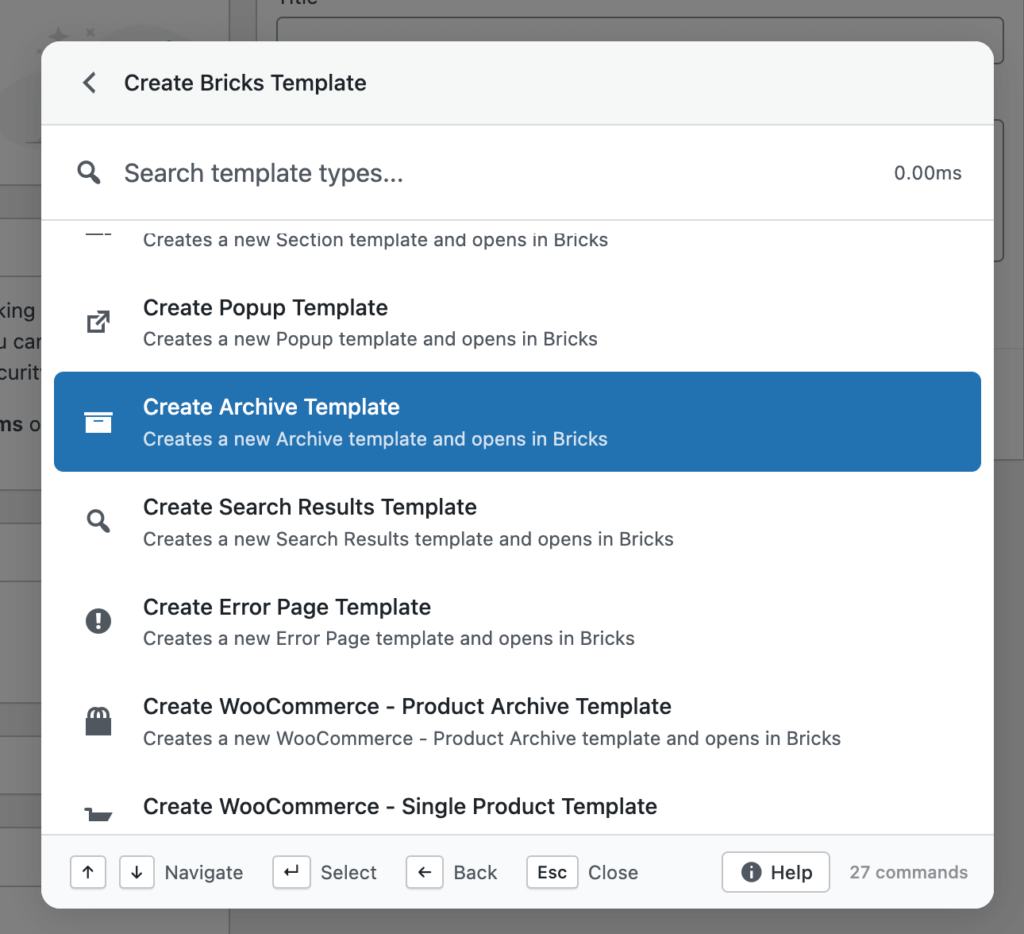
Page builders like Elementor and Bricks add their own menu sections. Security plugins, SEO tools, caching plugins, form plugins- each adds to the menu.
Navigating this by clicking is slow by nature. Finding an order requires: clicking WooCommerce, clicking Orders, waiting for the page to load, entering a search term, clicking the result. That is five steps minimum.
Repeat this thirty times a day for different orders and you have spent a surprising amount of time on navigation alone, for zero productive output.
A command palette replaces that entire sequence with: Cmd+K, type order number, press Enter. Two actions. The page loads directly on the record you needed. The arithmetic of daily friction is completely different.
What a Dedicated WordPress Command Palette Plugin Adds
Third-party command palette plugins for WordPress exist precisely because the built-in palette covers the editor use case well but leaves everything else untouched.
The most capable of these is Commandify, which is available as a free plugin on WordPress.org with a Pro tier that extends deeply into WooCommerce and page builder workflows.
Here is what a full-featured WordPress command palette plugin covers that the built-in version does not.
Full Admin Navigation from Any Screen
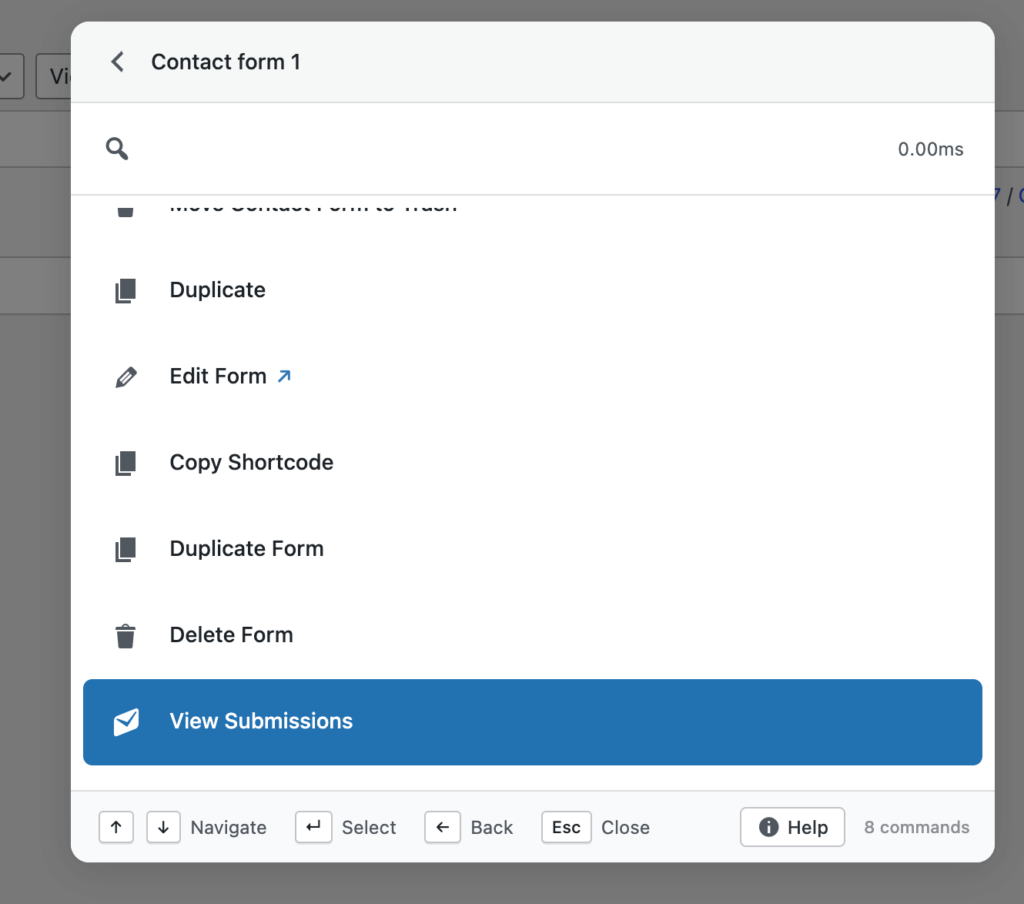
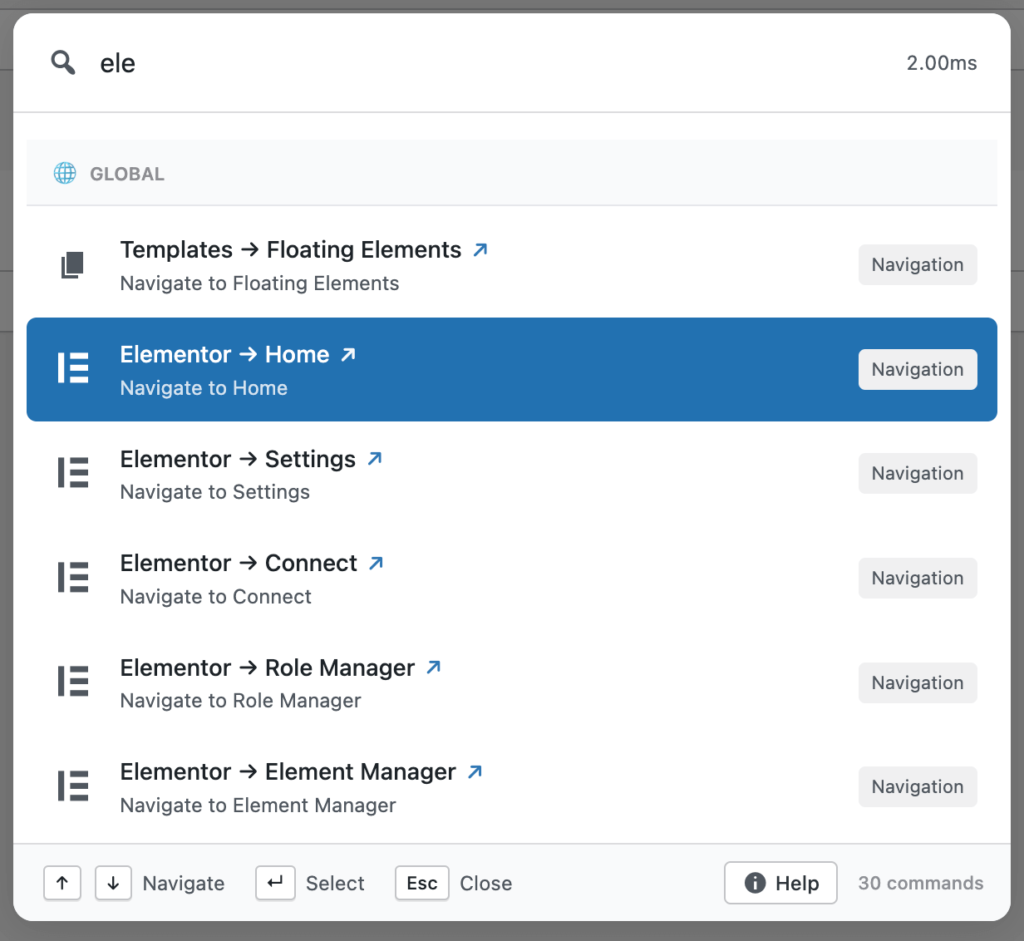
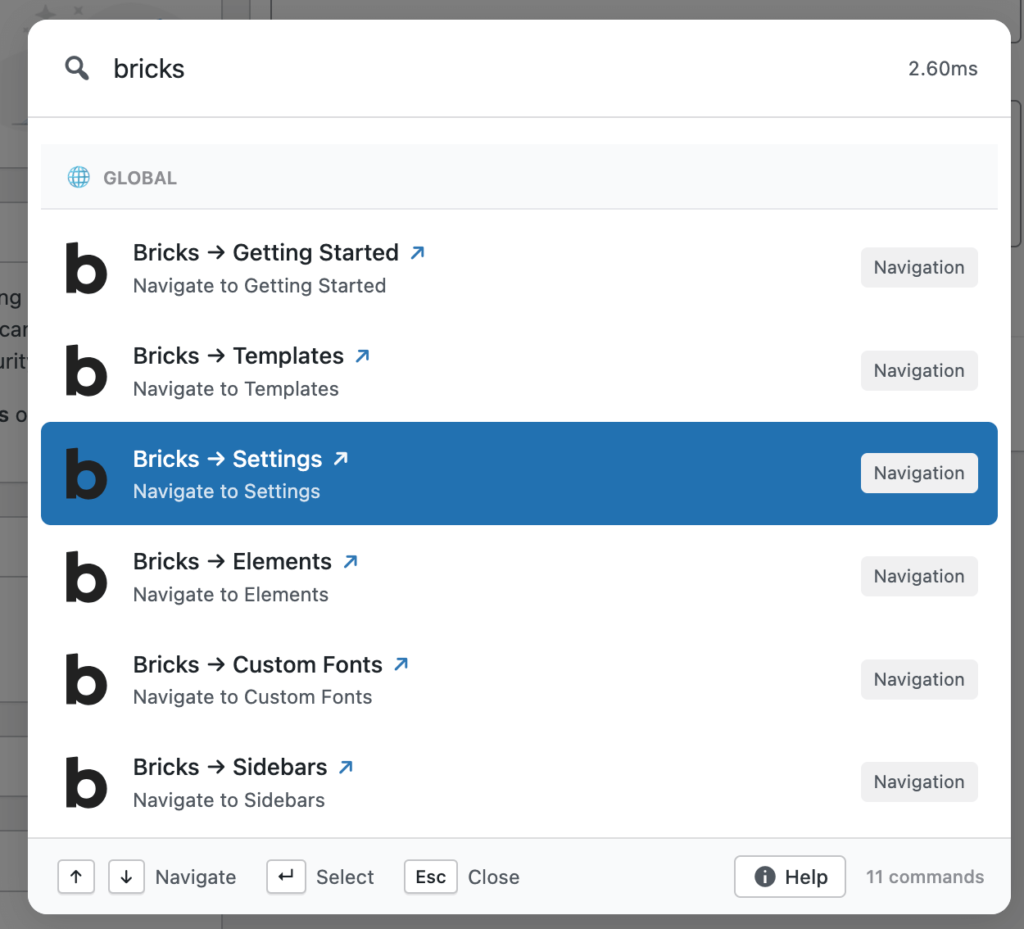
Unlike the core palette, which is constrained to the block editor context, Commandify is available on every screen in wp-admin from a single consistent shortcut. Cmd/Ctrl + K works whether you are on the dashboard, a WooCommerce screen, a plugin settings page, or anywhere else in the admin.
The palette mirrors your complete menu structure (every plugin, every nested page, every settings section) so anything reachable by clicking is reachable by typing.
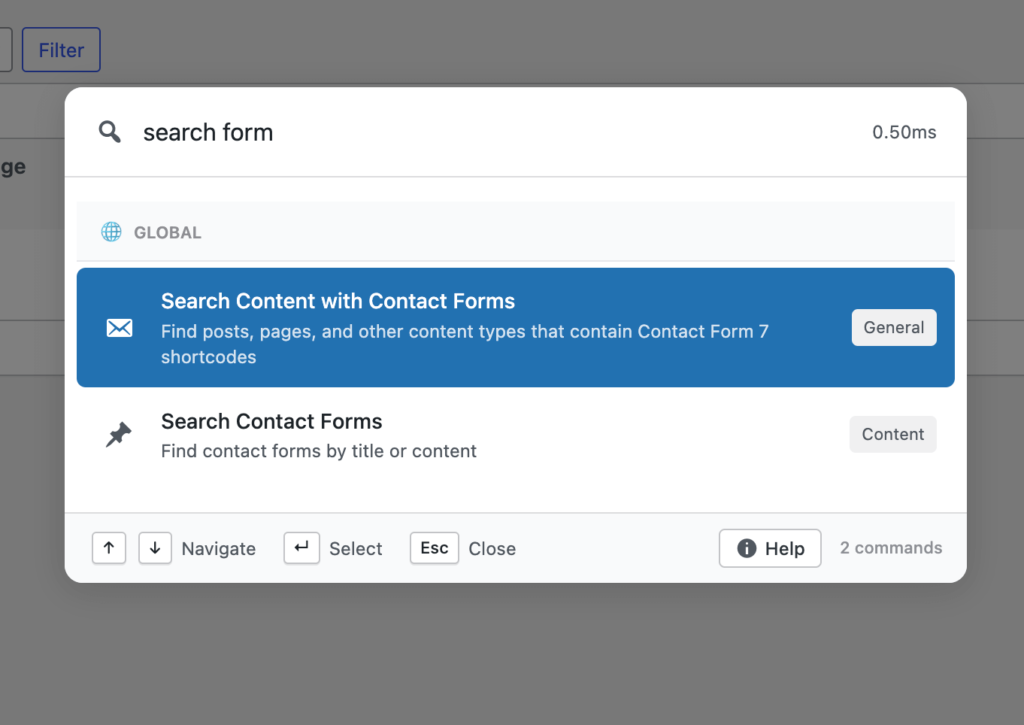
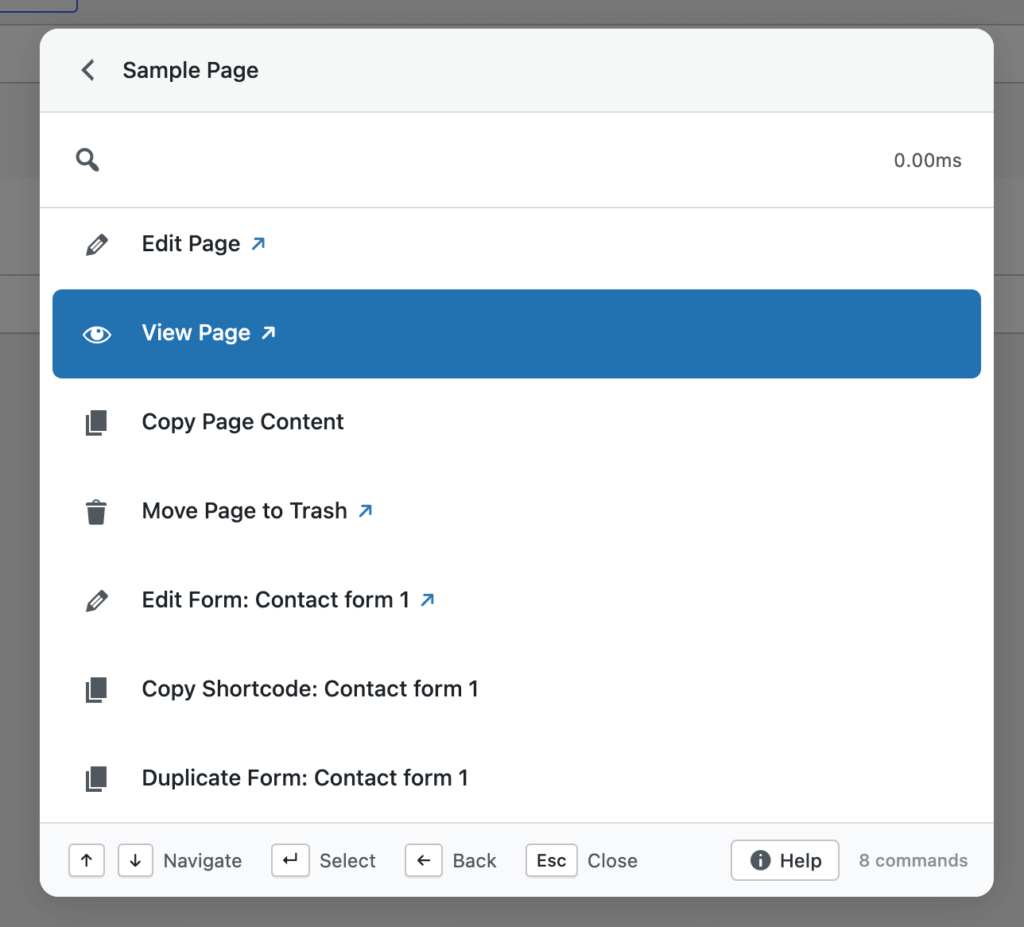
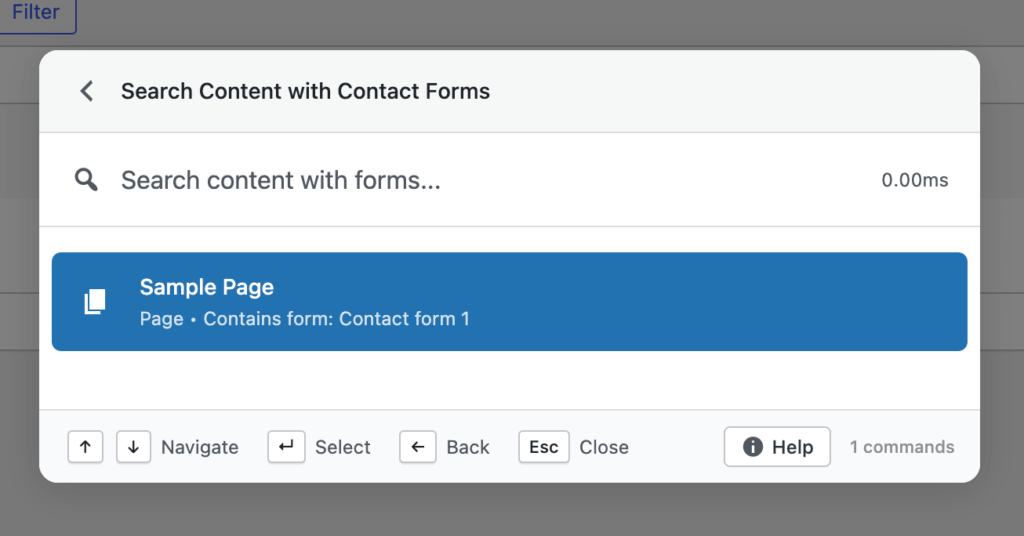
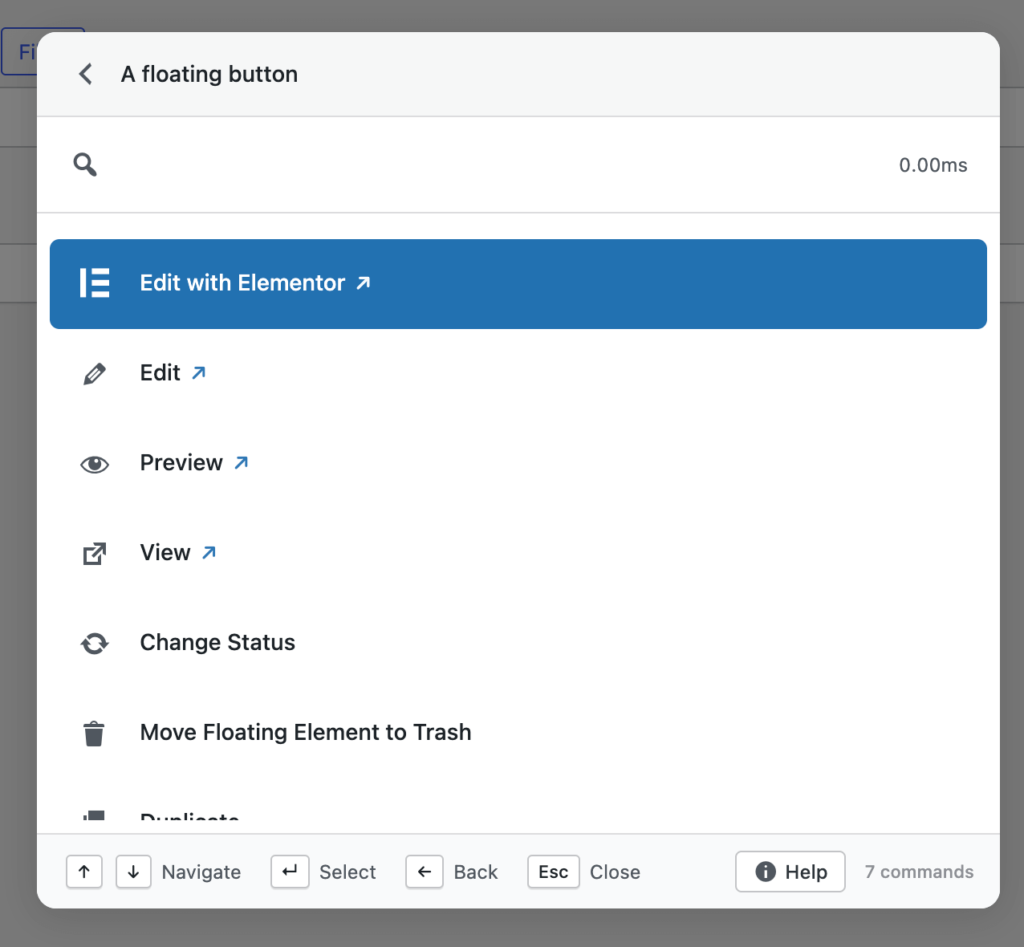
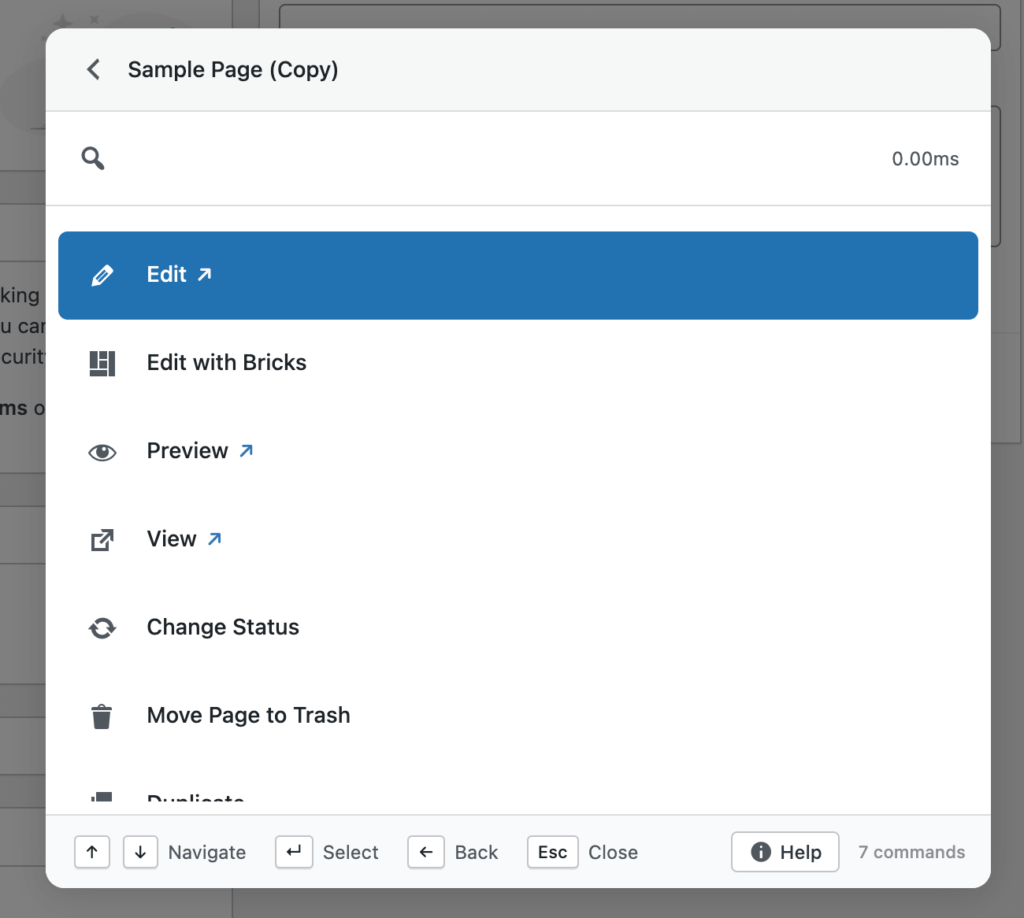
Content Search With Context
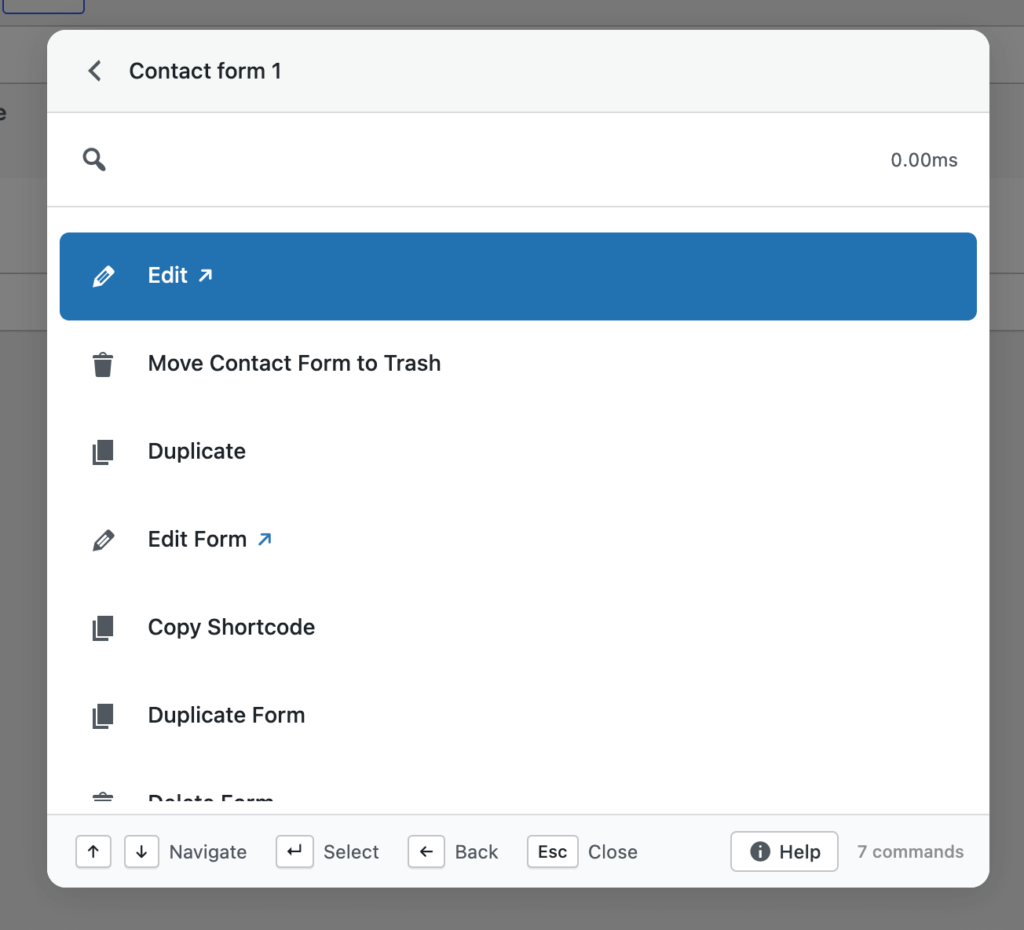
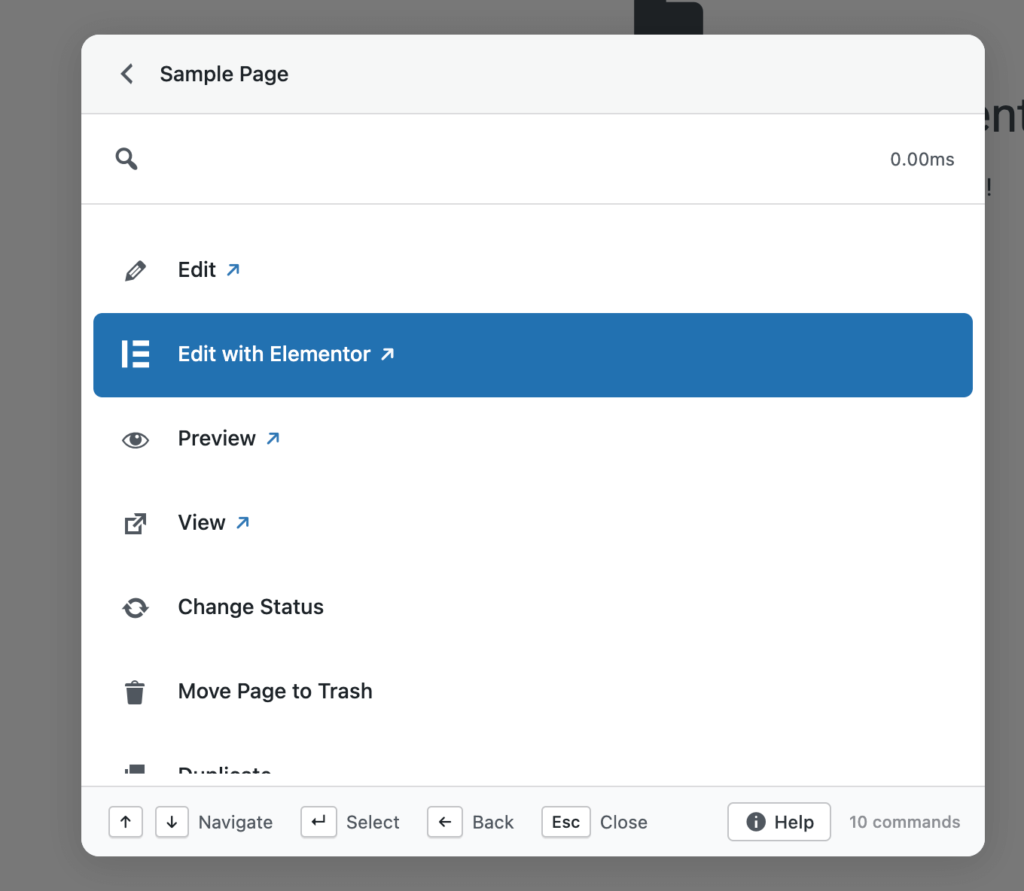
Type a post title fragment and the matching posts appear with their status, date, and author shown alongside. You can edit, view, preview, or trash the post directly from the result without opening it first.
The same applies to pages, media items, custom post types, and any other registered post type on the site. Search results include enough context to confirm you have the right record before you act on it.
User Lookup
Type a name or email address and matching user accounts appear. Open the user profile, check their order history, or manage their account from the palette result.
For membership sites, learning management systems, or any site with significant user accounts, this replaces the process of navigating to Users, searching manually, and scrolling through results. The guide on switching WordPress users and handling user issues faster covers this workflow in detail.
Maintenance Commands
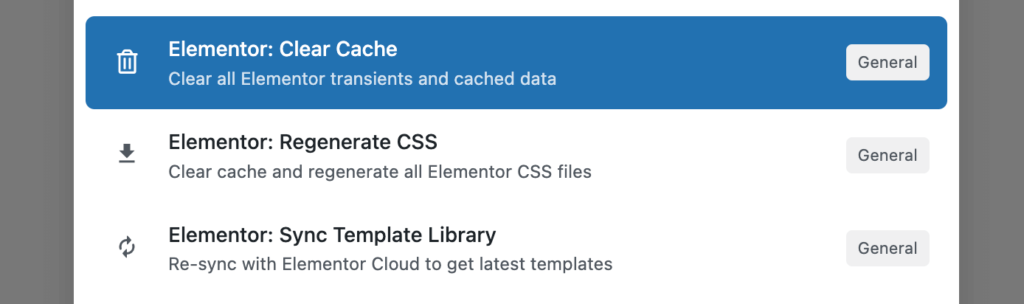
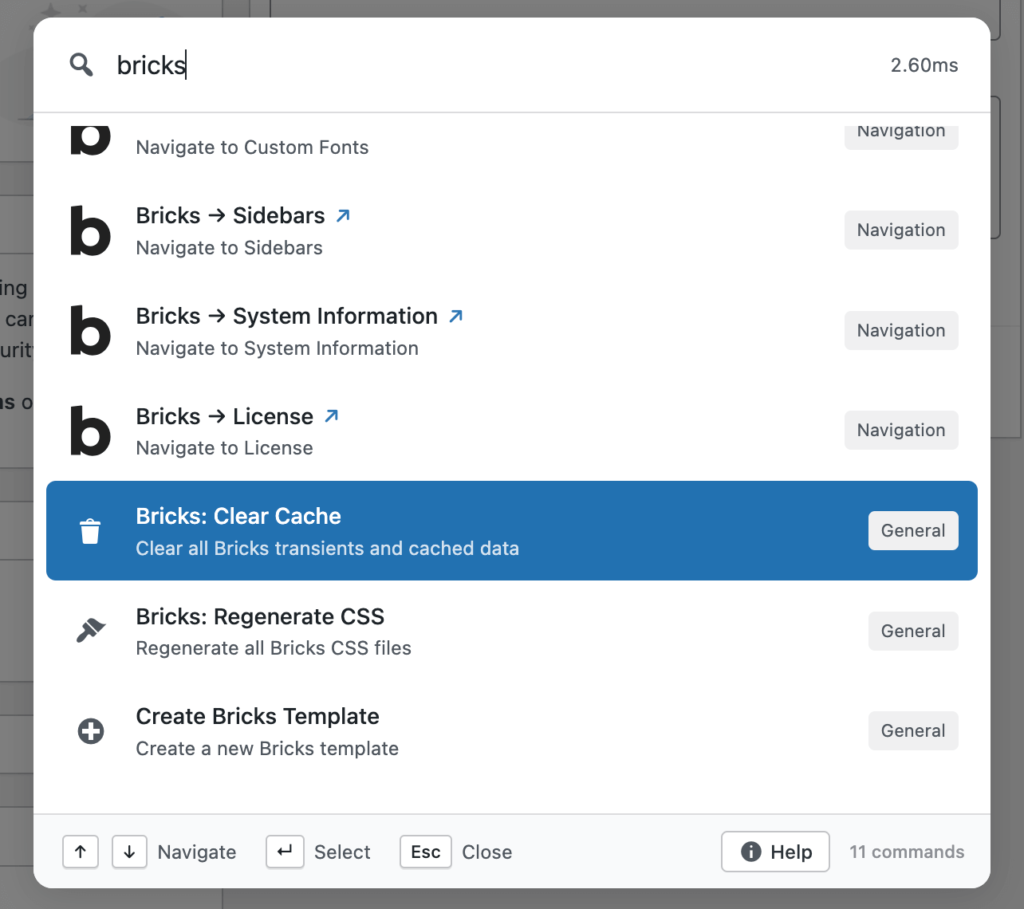
Commandify Free includes maintenance actions accessible directly from the palette: clear cache, flush rewrite rules, clean transients, regenerate thumbnails, and similar housekeeping tasks.
These are actual operations, not links to settings pages. Press the shortcut, type “clear cache,” press Enter. Done. No plugin settings screen required.
WooCommerce Command Suite (Pro)
Commandify Pro’s WooCommerce integration is the feature that most distinguishes it from every other option in this space, including the WordPress core palette, Turbo Admin, and any other command palette plugin currently available.
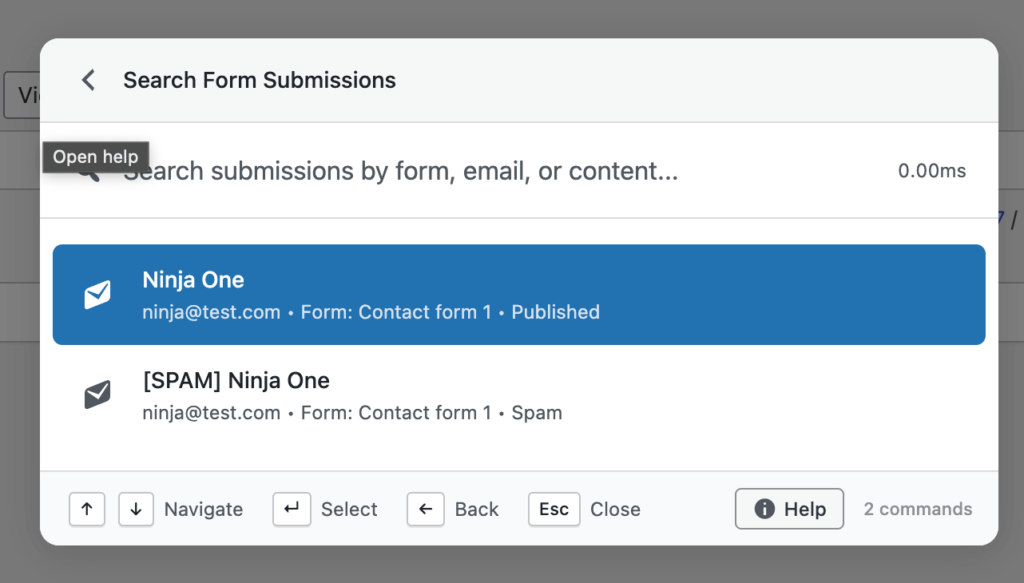
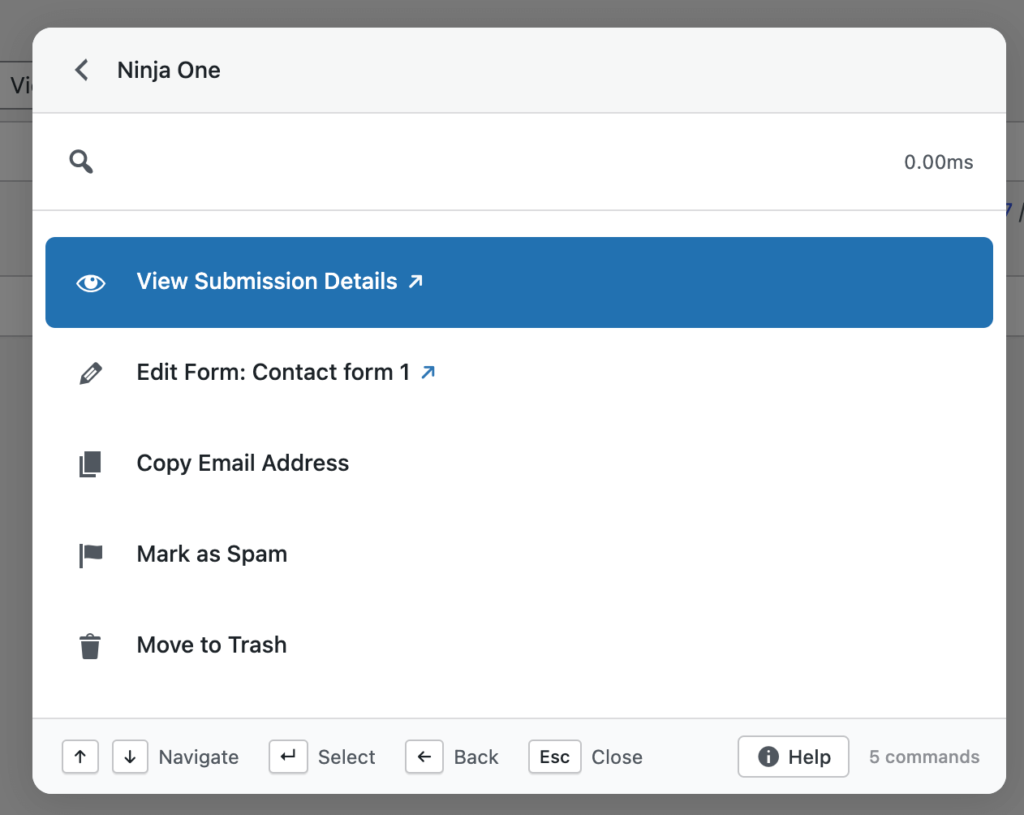
Pattern recognition identifies what you have typed without requiring you to specify a search category. A hash-prefixed number (#4521) is recognised as an order ID. An email address triggers a customer lookup.

A known SKU format opens the matching product variation. Actions available on each record (status changes, order notes, stock adjustments) are accessible from within the palette result without opening the full admin screen for that record.
The full scope of the WooCommerce command suite is covered in the WooCommerce management guide. For store managers handling daily orders and customers, the productivity difference is significant and immediate from the first day of use.
Who Benefits Most from a WordPress Command Palette
The honest answer is: anyone who spends more than a few hours per week inside wp-admin. But the benefits scale with how much you use the admin and how complex your site is.
WooCommerce store managers who handle daily orders and customer queries see the most dramatic improvement. Every lookup that previously required five navigational steps becomes a two-keystroke action. For high-order-volume stores, this is hours recovered per week, not minutes.
Agency developers who manage multiple client sites benefit from the speed of navigating to any admin screen without remembering where each plugin puts its settings. The fuller the plugin ecosystem, the more confusing the menu structure, and the more useful the command palette becomes as an alternative to that structure.
Content editors who publish regularly benefit from the built-in WordPress palette for editor navigation, and from a plugin like Commandify for cross-site and cross-content-type navigation beyond the editor context.
Developers building client sites benefit from maintenance commands and plugin management from the palette, reducing the time spent on setup and housekeeping tasks during site builds.
If you manage a simple one-page site and visit the admin once a week to publish a post, a command palette plugin is not a high-priority addition. If WordPress admin is part of your daily professional workflow, the question is not whether a command palette is worth it- it is which one fits your workflow best.
The Learning Curve
The most common reaction from new users of command palette tools is: “Why didn’t I have this earlier?” The pattern of pressing a shortcut and typing is immediately intuitive for anyone who has used a search engine, a code editor, or Spotlight on macOS. There is no training required to understand the basic interaction.
The efficiency gains compound with use. In the first week, you are still sometimes falling back to menu clicks for things you cannot immediately recall the name of. By the second week, most common actions feel faster through the palette.
By the fourth week, using WordPress without a command palette starts to feel unnatural in the way that using a computer without copy-paste would feel unnatural.
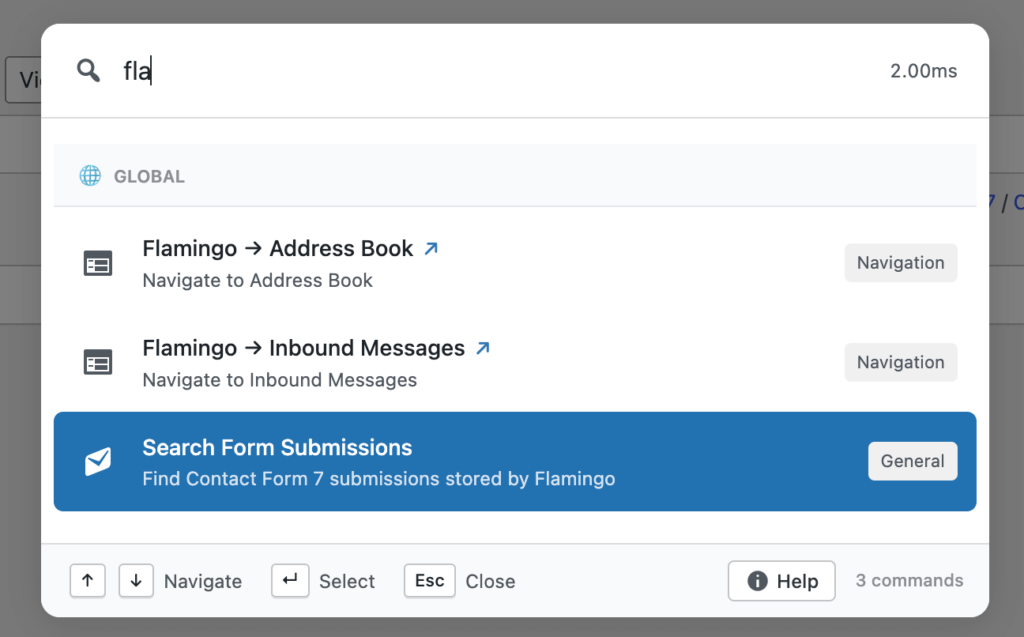
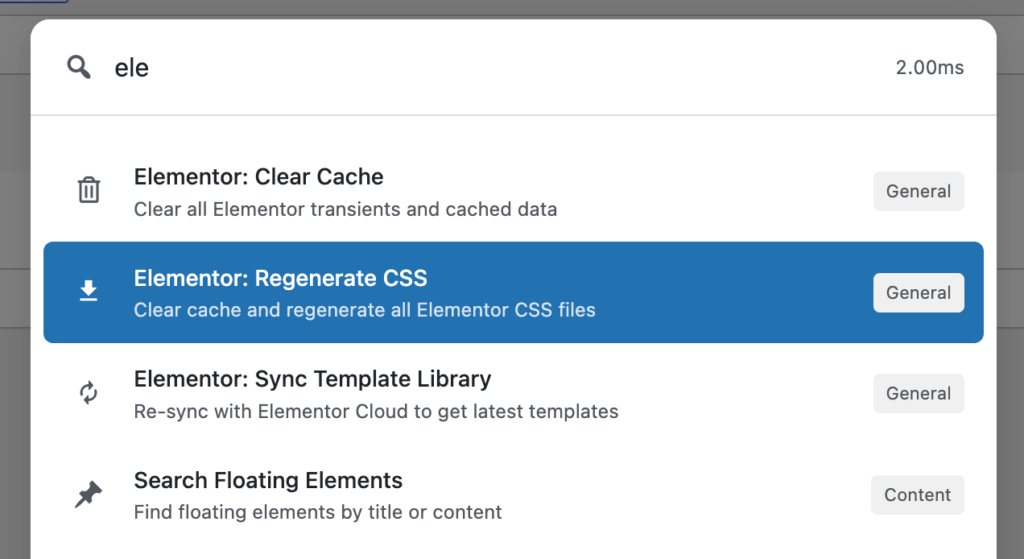
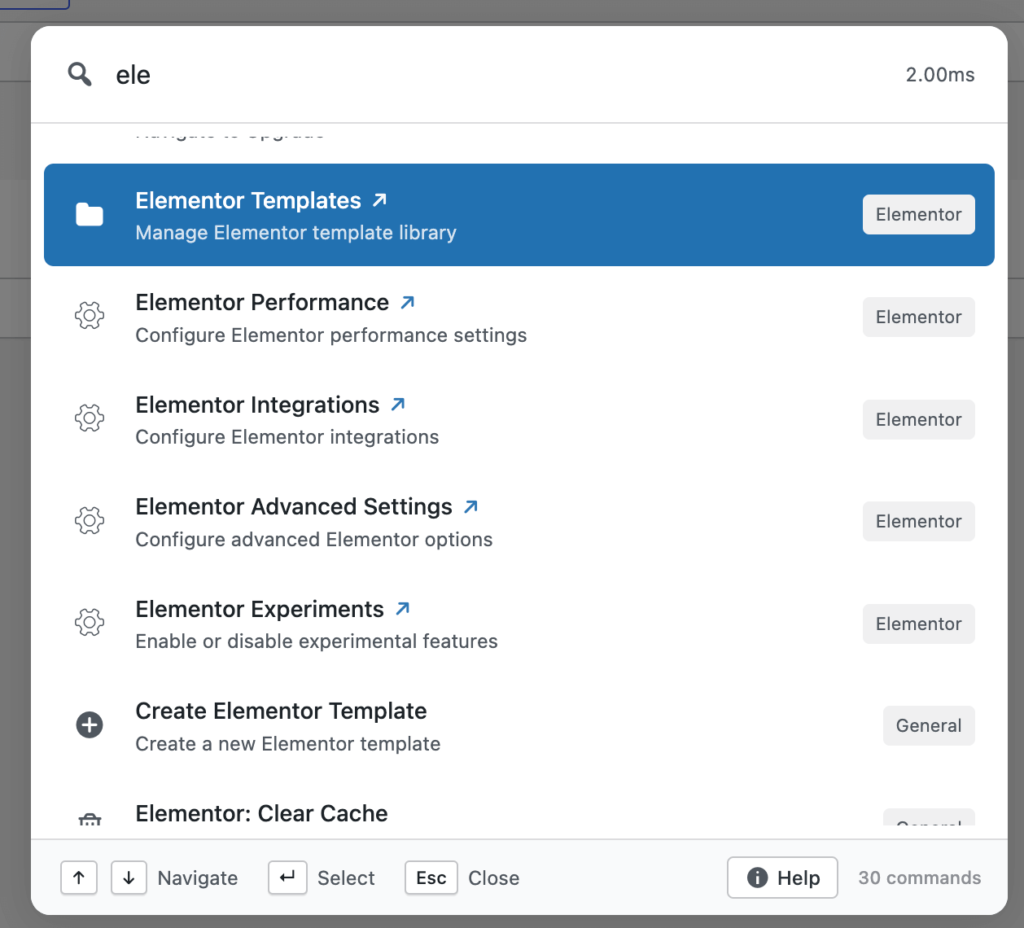
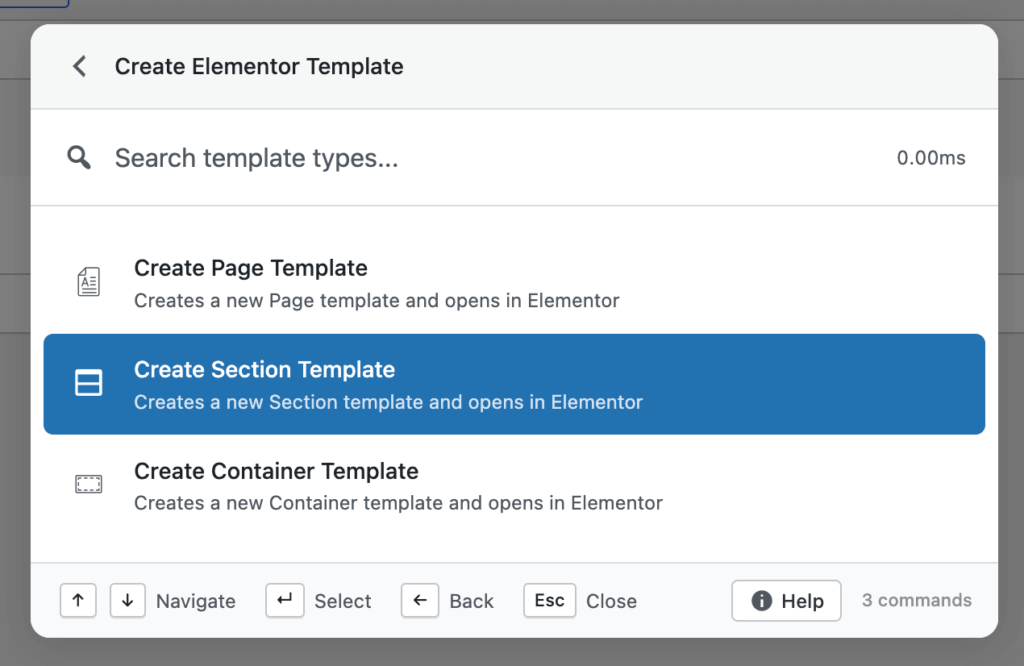
The fuzzy search in Commandify makes this transition even smoother. You do not need to type the exact name of what you are looking for. Type “woo order” and WooCommerce order screens appear. Type “elem temp” and Elementor templates appear.
The palette matches fragments and partial strings, so you get results even before you remember the exact wording of what you need.
How to Get Started in Two Minutes
The fastest way to understand what a command palette feels like is to install one and use it.
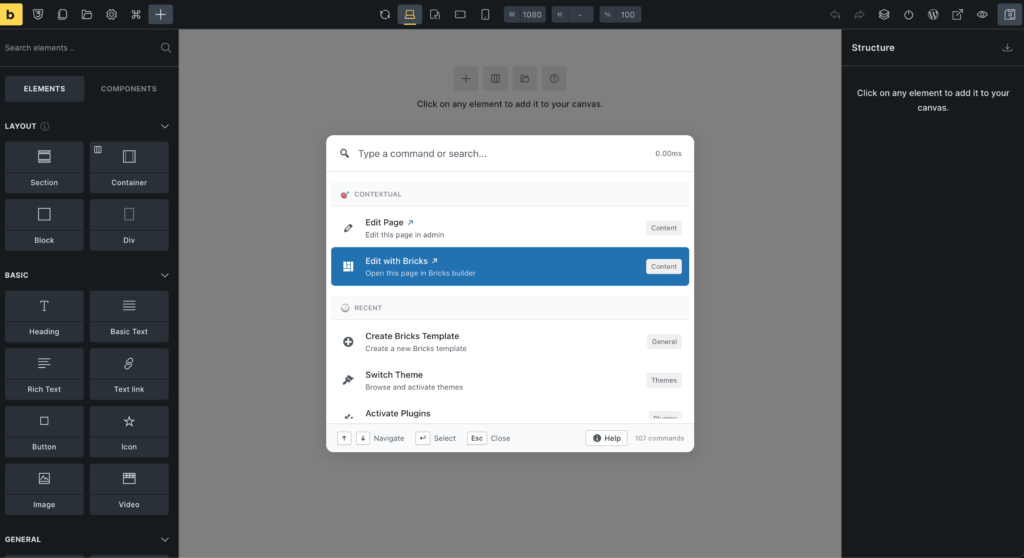
Install Commandify free from WordPress.org. Activate it. Press Cmd/Ctrl + K from anywhere in your WordPress admin. Type the name of any admin page- “plugins,” “users,” “settings,” or the name of a post you know exists on the site.
Watch the results filter as you type. Press Enter on the result you want.
That is it. You now understand what a command palette does for WordPress. The rest is a matter of which features matter for your specific site and whether the free version covers your needs or whether the Pro version’s WooCommerce and page builder integrations are worth the upgrade.
The 14-day money-back guarantee means there is no risk in finding out.
FAQs on What is A Command Palette
Is the command palette only for power users and developers?
No. The command palette is actually more accessible than keyboard shortcuts because you do not need to memorise anything. You just type what you want in plain language. “New post,” “clear cache,” “view orders”- these all work.
Any WordPress user who can type a search query can use a command palette from day one without any learning investment.
Does WordPress have a built-in command palette?
Yes. WordPress added a built-in command palette in version 6.3 (August 2023), accessible with Cmd/Ctrl + K inside the block editor and site editor. WordPress 6.9 expanded it to more admin screens.
However, it is focused on the editor context and does not cover WooCommerce, plugin management, user lookup, maintenance tasks, or most third-party plugin functionality.
Many users install a dedicated command palette plugin like Commandify to cover the complete wp-admin surface area that the core palette does not reach. The command palette limitations article covers the specific gaps in detail.
What is the keyboard shortcut for the WordPress command palette?
For the built-in WordPress palette: Cmd + K on Mac, Ctrl + K on Windows, within the block or site editor. For Commandify: the same Cmd/Ctrl + K shortcut, available on every wp-admin screen.
The shortcut is configurable in Commandify Pro if you prefer a different key combination. Turbo Admin uses a different default shortcut but also allows customisation through your browser profile settings.
Will a command palette plugin slow down my WordPress site?
No. Commandify loads its scripts exclusively in wp-admin, for authenticated admins only. It adds nothing to the public-facing site for regular visitors. The plugin uses client-side filtering for most search results, which means no additional server requests are made per keystroke.
Longer operations like cache clearing or database maintenance display a progress indicator while they run. There is no measurable frontend performance impact.
What is the difference between a command palette and WordPress keyboard shortcuts?
Keyboard shortcuts require memorisation. You press a specific combination of keys to trigger a specific pre-assigned action. If you do not remember the shortcut, you cannot use it. A command palette requires no memorisation- you type what you want in natural language and the palette finds it for you.
The command palette is also more flexible: it surfaces dynamic content like specific posts, orders, and users based on what is actually in your site, which static keyboard shortcuts cannot do.
The two tools complement each other; a full guide to WordPress keyboard shortcuts covers the shortcuts worth memorising alongside a command palette workflow.