NPS Voting to Measure User Loyalty
Pollify Pro’s NPS (Net Promoter Score) voting block makes it easy to ask your users one of the most important questions in business:
“How likely are you to recommend us to a friend or colleague?”
With a simple 0–10 scale and optional feedback form, you’ll get a pulse on user satisfaction—directly inside WordPress. No need for third-party survey tools.
Why Use the NPS System #
This system is perfect when you want meaningful, data-driven insights about your users. Here’s what makes it essential:
- Tracks sentiment based on real customer feedback
- Automatically classifies respondents as Promoters, Passives, or Detractors
- Measures loyalty, satisfaction, and experience quality
- All results and analytics are viewable in your WP dashboard
Best Use Cases for NPS Voting #
The NPS system works across many industries and websites:
- WooCommerce Stores – Run post-purchase surveys
- LMS & Course Platforms – Ask learners about their experience
- Blog/Media Sites – Learn how helpful your content is
- Plugin or SaaS Products – Collect user feedback on support or onboarding
- Agencies & Freelancers – Understand client satisfaction after a project
Add the NPS Block in Gutenberg #
To insert an NPS voting block:
- Open any page or post in the Gutenberg editor.

Use the + Block Inserter to search for NPS.
Add the block to your desired location.

The block includes both a score slider (0–10) and optional feedback field. Users see it as a popup after a certain number of visits.
Configure NPS Block Settings #
General Settings
- Title – Name your NPS poll so it’s easy to identify in the analytics.
- View Threshold – Define how many visits a user must make before the popup appears.
Response Settings
- Allow One Response Per Computer – Prevent duplicate feedback.
- Logged-in users are tracked via User ID
- Logged-out users via IP address
- Thank You Message – Show a custom message after the user submits their feedback.
Style Settings
Customize everything from layout to button text:

- Question Field – Set the NPS question text
- Feedback Heading – Change the title above the optional comment box
- Color Options – Set background, text, and button colors
- Padding – Adjust spacing around content
- Borders – Add custom outlines and rounded corners
- Button Width/Alignment – Adjust alignment and size of the submit button
- Button Text – Easily edit text like “Submit” directly in the editor
Toolbar Settings
Switch between editing the NPS rating and Feedback view. When shown on the frontend:

- The NPS score appears first
- Then the feedback form
- Finally, the thank-you message
What Visitors See on the Frontend #
Once a user visits your page the set number of times, a popup appears asking for a rating (0–10).

After they vote, a second popup invites them to leave optional written feedback. Then they see the thank-you message.

This multi-step process happens without page reloads and works beautifully across devices.
Access NPS Results in the Admin Panel #
Head to Pollify → NPS in your WordPress dashboard. Click on any NPS item to view detailed reports.
Admin Tabs Overview
1. Overview

- Response Summary – See total votes, unique responses, completed feedback, and NPS score
- Promoters/Passives/Detractors – Auto-categorized based on response value
- Popular Locations – Shows map data of top respondent regions
- IP Overview – Top IPs and voting behavior with block/remove options
- Recent Responses – See the last 20 feedback submissions by IP and rating

2. Reports
- Graphical breakdown of votes across the 0–10 scale
- See how satisfaction trends over time

3. Responses
- Table view of individual ratings and written feedback
- Timestamps and full message visibility

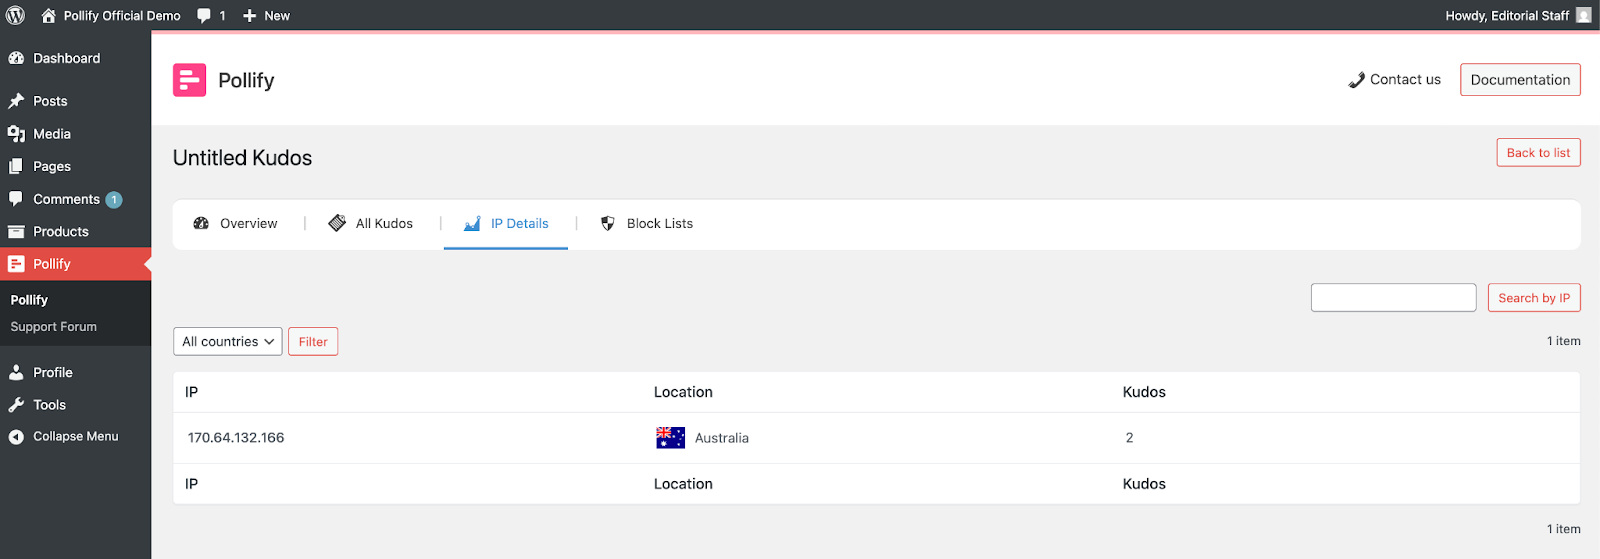
4. IP Details
- Lists IPs, response count, and country
- Remove or block IPs if needed from NPS responses
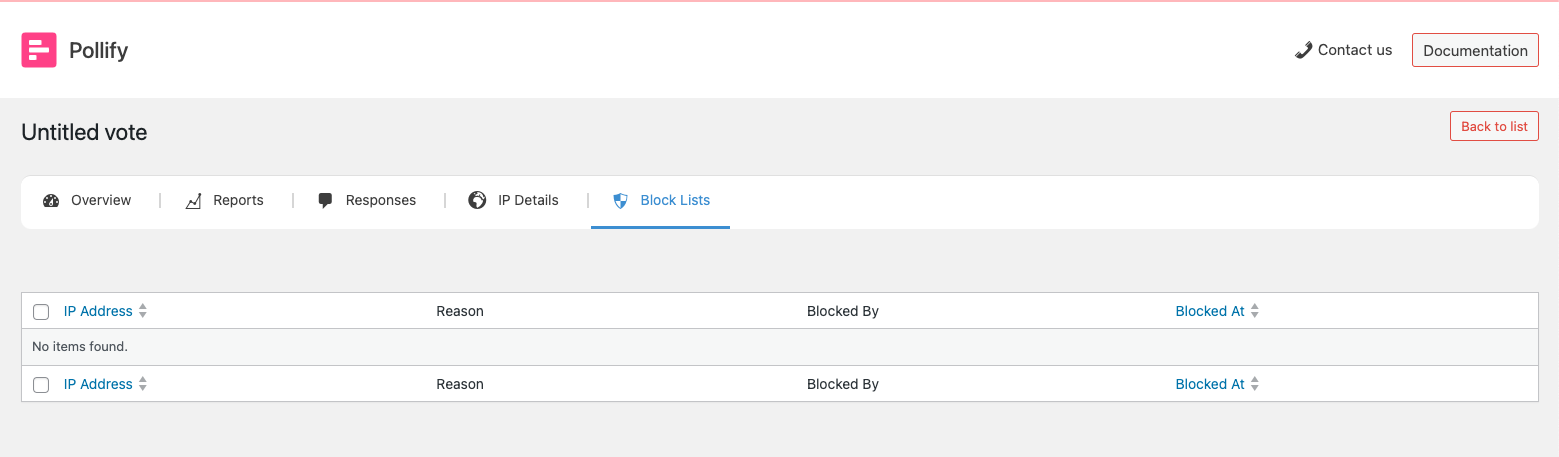
5. Block List
- View and manage blocked IPs
- Unblock any address manually
Why Pollify’s NPS System Beats Crowdsignal #
Pollify gives you more power and control:
- Built directly inside Gutenberg- no external iframe embeds
- Full data ownership- no third-party servers
- Customize everything- from button to borders
- Keep all analytics and moderation within WordPress
Crowdsignal can’t match this native experience.
Learn More and Get Started
See the full Pollify Feature Breakdown to explore everything that comes with Pro.
Compare plans on the Pollify Pricing Page and find what’s best for your site.
Need setup support? Contact Us Here — we’re happy to help you get going!


