Poll Creator by wpRigel empowers you to create engaging polls effortlessly, right within your WordPress site.
Here’s a quick guide and official docs to help you make the most of this powerful WordPress poll plugin.
Installing Poll Creator Plugin #
Installing the Poll Creator plugin by wpRigel is a breeze, just like any other plugin in the WordPress repository. Follow these simple steps to get started:
System Requirements
For the best performance and compatibility, make sure your server meets the following requirements:
- PHP 7.4 or later
- MySQL 5.7 or later
- WordPress 5.0 or later
If you haven’t installed WordPress yet, reach out to your hosting provider for assistance. Ensure they meet the PHP and MySQL version requirements.
Installation Process #
- Install the Free Version from your WordPress dashboard
- Navigate to your WordPress dashboard.
- Go to Plugins → Add New.
- Search for “Poll Creator” in the search bar.
- Click on “Install Now” next to the Poll Creator plugin.
- Activate the plugin after installation.
- Get Free or PRO Version from wpRigel and upload to WordPress
- Head to wpRigel and download the Free/PRO.zip file from your account dashboard.
- Log in to your WordPress admin panel.
- Go to Plugins → Add New → Upload.
- Choose the PRO.zip file you downloaded.
- Click on “Install Now” and activate the plugin once installed.
- Verification:
- After activation, you’ll see a new menu named “Poll Creator” in the WordPress sidebar.
- If the menu appears, congratulations! You’ve successfully installed the Poll Creator plugin.
Using FTP? No problem: If you prefer using FTP to transfer files, simply unzip the plugin and upload the directory to your server’s plugin directory.
With the Poll Creator plugin installed, you’re all set to create engaging polls and gather valuable insights from your audience. Happy polling!
Poll Creator Feature List and Plugin details #
Once the plugin is active we provide a single block called `Poll` and using that block, the admin can create online polls in WordPress using Gutenberg editor.
In the Gutenberg block, there are a couple of options we are providing like
In Editor section #
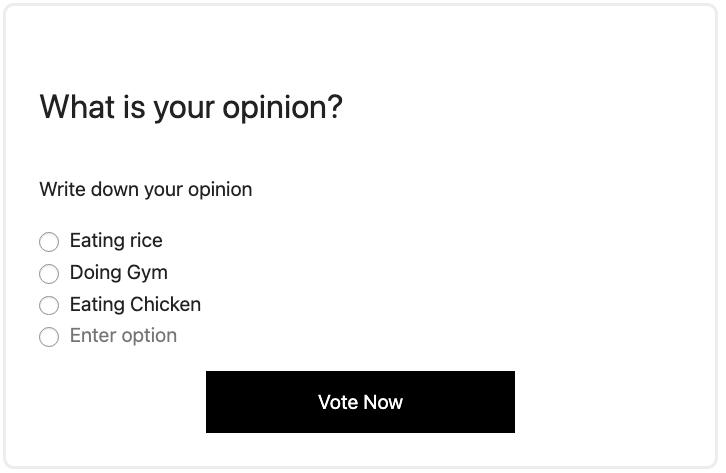
- Add the tile
- Add the description if needed
- Add poll options/questions
- Change the vote button text
In Sidebar settings: #
General Settings: #
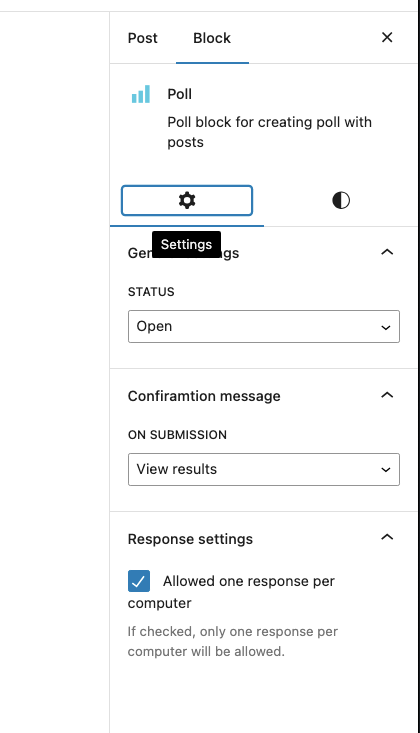
1- Status: It depends on whether the poll is showing on the front end or not. There are three types of status Open, closed, and Close after.
- Open: This Means it will open for taking votes from front end.
- Close: This means it will close and when admin closes this poll there, the user can’t give any votes from frontend.
- Close after: It means admin can schedule a poll closing time. After that time user can’t give any votes on that poll
2- When your poll is closed: This setting has three options called ‘Show results’, ’Hide poll’ and ‘Show poll message’. When admin select Show results, user will see a poll results when poll is closed.
If admin selects Hide poll that means this poll will not show in frontend after closes. And for showing poll message will show a custom message when poll is closed.
3- Confirmation Message: These settings help to user feedback after submitting the poll. There are two types of options for now. One is View message which helps to user show a simple message after submitting the poll and the other option is View result which means users will be shown poll result after submitting the poll
4- Response settings: It helps to user submit the poll a single time or multiple times per computer. The user response is calculated through the user ID if the user is logged in otherwise tracked using an IP address.
Styles in Poll Creator Plugin #
Here’s the overview of styles in poll creator plugin-
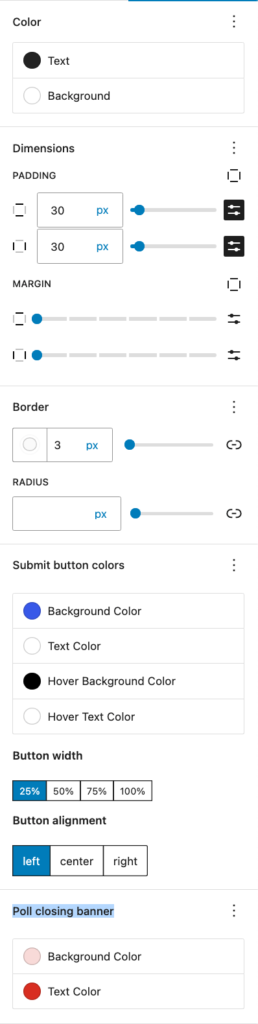
- Color: It handles the text color and background color for the main poll form
- Padding: This helps to set some extra space inside the poll form
- Margin: It helps to give some extra spacing up and down from poll form to other blocks or text
- Border: It is used for adding a border with color for the poll form
- Radius: It will add a radius for four corners of the poll form
- Submit button color: Using these settings admin can set the background, text hover background, and hover text color for the submit button
- Button Width: Using this admin can set button width into four sizes
- Button Alignment: This helps to set the button alignment respective to the poll form
- Poll Closing Banner: This will help to design the closing banner for your poll.
Poll Creator Toolbar settings #
Alignment: Inside this toolbar, option admin will get 4 types of alignment options None, Wide width, Full width, and Align center which helps to set the form position.
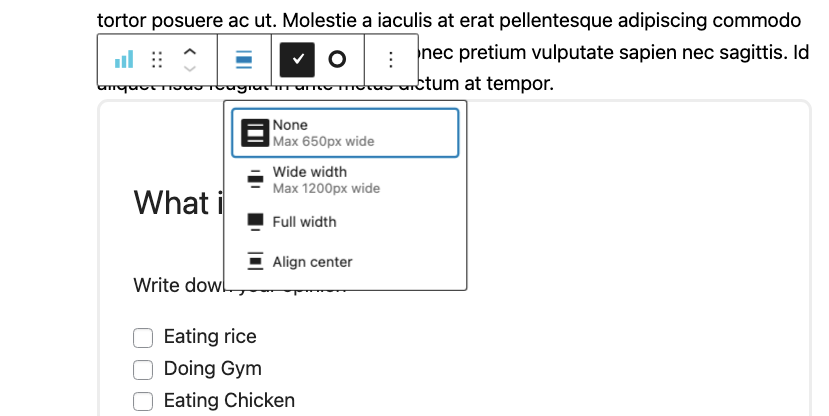
Single checkbox: Used for single poll option selection in frontend.

Multiple checkboxes: Used for multiple poll option selection in frontend.

Analytics and Reports in Poll Creator #
Admin also gets an admin page called `Poll Creator` in the backend dashboard where we will show all the matrix data regarding polls.
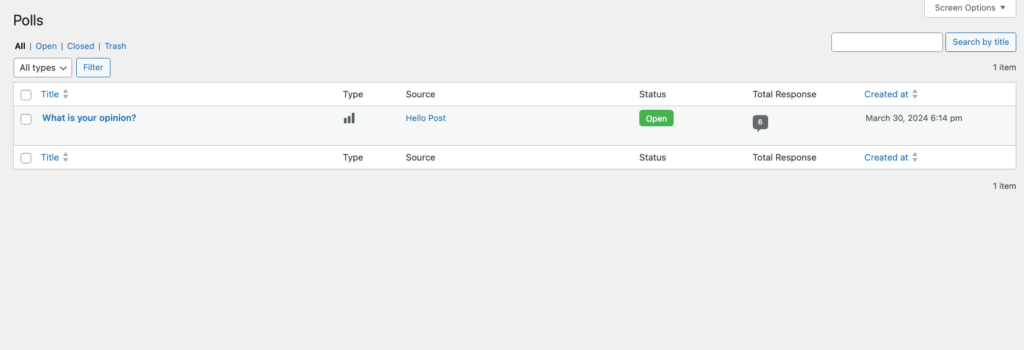
- Poll lists: On this page, the admin will get all the polls that he/she created in the Gutenberg editor for different post types.
Here are a couple of things the admin can manage on this page.
- View all the poll lists where we will show poll titles, types, Source/Reference, Status, Total responses, and Created date.
- Admin can filter all the polls using status and type-wise.
- Admin can sort polls using the title and create-date field.
- Admin can search poll using title
- Admin can reset the poll results using the row action. When admin hovers the title a reset option will be found.
- Poll overview page: On this page, the admin can get all the data regarding each poll. Here are a couple of data admins will see on the poll overview page.
- At a glance: In this section admin will see the overview results for the poll including total votes and individual votes and percentages.
- Popular location: In this section, the admin will see the votes for popular locations. Also, he can see the locations on the map as well as the sidebar
- IP overview: In this section, the Admin will get the latest 5 IP details with vote counts and there is an option called See All where the admin will redirected to the IP Details page for analyzing all IP addresses including location and vote counts.
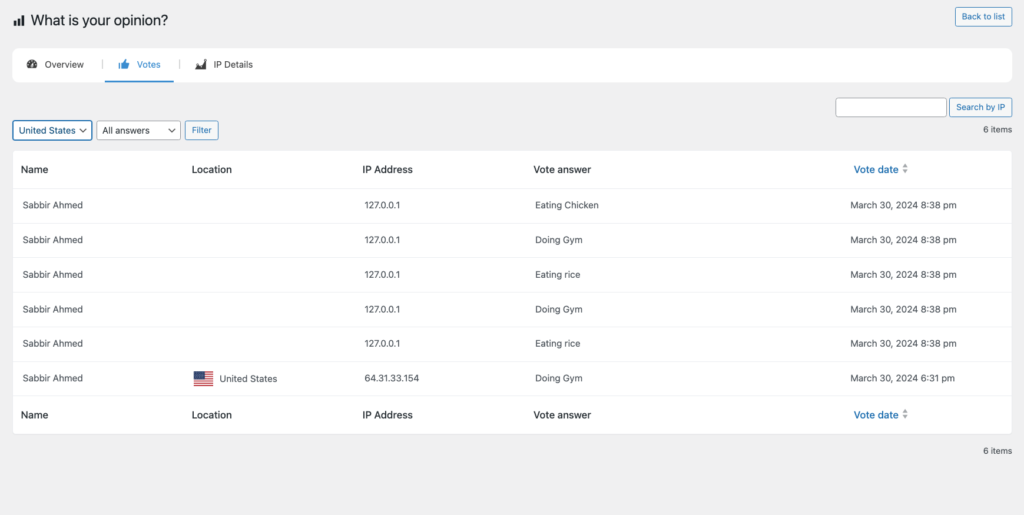
- Recent Votes: In this section, the admin will see 20 recent votes including IP, location, and which option the user selected. In the below admin will get the See All option where the admin will redirected to the All votes page where the admin can see the vote details including locations, IP address, and vote time

- Votes page: On this page, the admin will view all the votes related to the individual poll. Admin can analyze the data using the votes list table
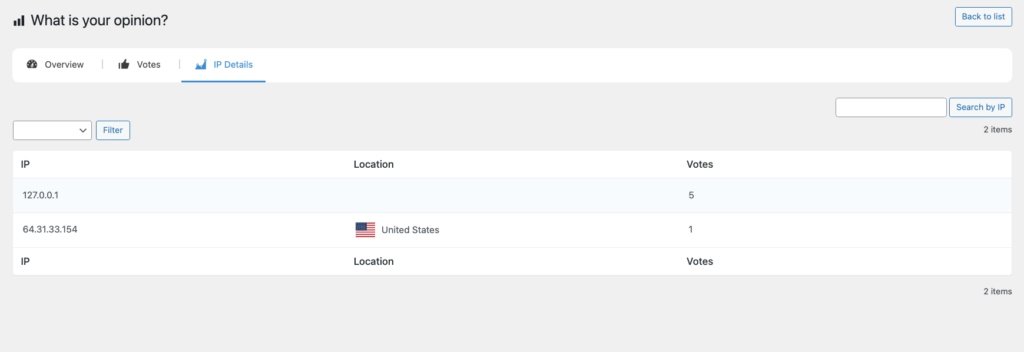
- IP Details page: On this page, Admin will see all the IP addresses including total vote counts for each IP and location.
That’s all! Thank you!
Learn all about online polls and surveys in WordPress and beyond.
Check 150+ random poll questions to make your poll creation experience even better.
Contact us for any further queries or support.


